Tech Tip: Skins, drying, cleaning, re-activating glue

Drying Skins
ALWAYS dry your skins vertically after touring with them. If your skin glue comes in contact with water for prolonged periods of time it changes the glue chemistry (known as hydrolyzing) making it softer and more likely to ball up or stick to your base, and easier for debris to stick to the glue.
One of the most common mistakes made is to stick skins together when they are wet (after touring) and then pull them apart when they are too warm. The skin glue will tend to transfer on to itself in places. This process is made worse when they are wet because the glue is already soft. Once the glue transfers on to itself it will deteriorate rapidly because the glue surface will stick in the high places, and not as much in the low places. If your skin glue does become uneven, you can reactivate it using the instructions below.
There are lots of ways to dry skins, but do not get them too close to direct heat such as a stove, heater, or forced air. Too much direct heat will destroy the skin glue. Forced air will cause the skin glue to dry too much, making it less tactile. Dry them vertically. It is best to either drape them over a chair or fold them over a hanger over night. I have a hanger with clips that I hang them from because I have a cat who thinks it’s her duty to rub on everything.
After drying, store them with the cheat sheet folded glue-to-glue (adhesive side against itself). This will help the glue maintain maximum adhesion. By keeping your skins stored in a cool dry place, they will be in optimum condition for the next use.
Cleaning skins


Cleaning your skins periodically and reactivating the glue will prolong the life of the skins without having to resort to a complete re-glue. Unless something unusual happens, I will clean my skins at the end of the riding season before storing them. There are a few reasons for this; the dirt does not store and imbed in to the glue. Clean skins also store better with wax, dirt and grime cleaned out of the plush for storage.
Before cleaning skins, it is best to pick out any large pieces of debris caught in the glue. Tweezers work best for this.
Prepare a bucket of cold water (do not use hot water, you will jeopardize the glue integrity making it soft and gloppy). Use a few drops of dishwashing detergent and lightly brush the plush side of the skins. After agitating, soak them in the water over night.
After soaking change the water and a few times to rinse. You will be surprised just how much dirt is trapped in the plush. Now dry your skins the same as you would after a day of riding (on a hanger or over a chair). After the skins have dried, it is best at this point to reactivate the glue.

Reactivating the glue
Skin glue loses it’s tackiness in two ways;
- From water hydrolyzing in the glue (being stuck together while wet), which causes to glue to become soft and balling.
- From debris, dust, dirt impregnating the skin surface and loosing it’s effectiveness (opposite of above).
Both problems can be fixed by reactivating your glue in the steps below. This heating process will A physical energy that can push or pull on something. Your weight is the force that you push on the earth with, when there are no other accelerations." class="glossaryLink " target="_blank">force dirt and debris down, and the reactivated glue to the surface. It will also drive out moisture through heat and on a molecular level will redistribute the tackiness of the glue.
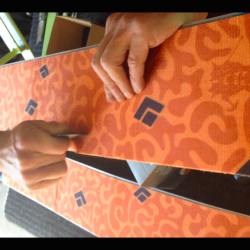
Just as you use heat to apply a re-glue, you can also use heat to reactivate the skin glue. If you saved the transfer sheets (the paper backing) from your skins you will replace this onto the glue side of skins. You can also use freezer paper, parchment paper, or a similar non-stick release paper.


Next turn your wax iron on to a low setting. Place a paper bag or craft paper between the iron and skin with transfer paper and slowly heat the glue side back up with long passes. You will need to experiment with the heat setting on the iron, slowly bringing the temp up. You want to melt the glue, but not to the point that it bubbles.
Be careful not to force the glue off the edges of the skins. Try to allow the iron to glide across, do not push or force the iron down. Allow the skins to cool completely before pulling the transfer paper off. I you do this while the skins are hot, the glue may pull with the paper. Once your skins are cooled, they should look brand new. Place a cheat sheet on one half, and fold the skin on to itself glue-to glue.